


Rapid Shading in Photoshop
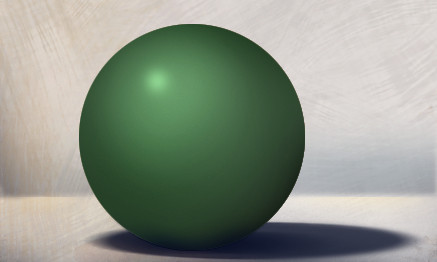
Realistic shading in Photoshop does not have to take a lot of time. To illustrate, we are going to shade a simple sphere in thirty seconds or less.
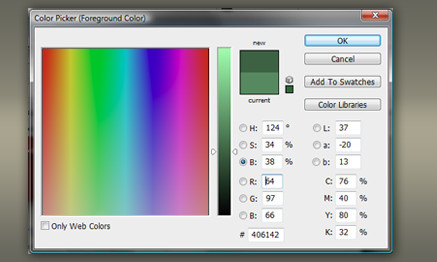
Create a circular selection and a layer to begin the process. Choose a base color for your sphere, then fill the selection. In the layers palette, duplicate the layer by dragging the layer name onto the “Create New Layer” icon. Click on you foreground color to call up the Color Picker, select the “Brightness” button and drag the slider downward to get a darker version of the same color.
Fill the duplicated layer with the darker color, then with a soft edged brush, erase part of this layer. This will reveal the lighter color underneath, and voila, you have created your shadow. Calling up the color picker again, drag the slider upwards to create a lighter version of the original color. On a new layer, tap the sphere with a soft edged paintbrush to create the area where the light is striking the sphere. Calling up the color picker again, drag the slider upwards to create a very light, almost white, version of the original color. On a new layer, tap the sphere with a small paintbrush to create the specular highlight. You now have a three dimensional looking sphere.
This is a very simple example of the technique, but the same process can be applied to even a very complex shape.


