


Archive for the 'Painter' Category
Brush Jitter in Painter
Corel Painter X3 has a new feature that adds random jitter to brushes to make them more realistic. This was created with a few random strokes of the “Real Wet Jitter Sponge” which is a watercolor brush.
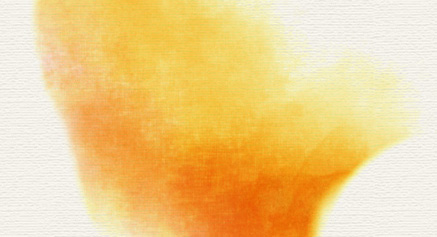
Painter includes about 25 preset jitter brushes which fall into various brush categories. You can adjust the amount of jitter a brush produces. The controls vary depending on the brush category, but some examples that can “jitter” are opacity, grain, size, angle, stroke, and color expression.
Pencils in Painter
Even though I do a lot of my digital art in Photoshop, Painter is still a very valuable tool. Its dedication to traditional media brushes and pencils is invaluable for getting certain strokes and textures. There are a lot of possibilities and unlimited variations. Here are a few samples of out of the box pencils.
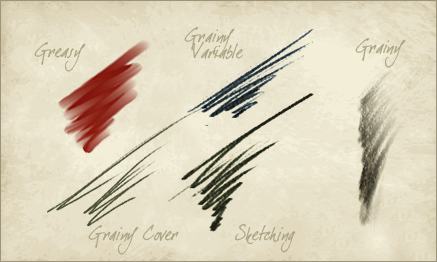
Painter also allows you to save to a PSD file, so if you want to create a piece with both Photoshop and Painter you can. Use the most effective tools from each software package to maximize your efforts and create something impossible with each one alone. I guess it is a “mixed media” painting in a digital sort of way.
Creating Seamless Textures
I use textures very frequently in my work, and a very simple trick can make them a lot more useful. It is often advantageous to have the texture tile seamlessly. To put it simply, have the pattern repeat, but in a way that is not apparent to the viewer. Usually signs of a repetition appear at the pattern edges. By using the “Offset” filter, which is found in Photoshop under Filter | Other | Offset, you can shift the pattern so the edges are visible. Set the horizontal and vertical distances as appropriate for your image, and check the Wrap Around radio button. The pattern will shift revealing the edges.

Once the edges are visible, rub them out with a sampling of the pattern. Run the Offset filter again, and look for any edges you might have missed. Repeat this exercise until edge lines are no longer visible. While rubbing out the edges, pay close attention to any distinguishing features in the pattern that might jump out as the pattern repeats. These should be rubbed out as well.
The final step is to fill a large area in a test file with your new pattern. If you cannot see any obvious repetition, your new pattern is a success!
Quick Brush Selection in Painter
When using Painter, the media and brush selector appear in the upper right hand corner of the screen. Selecting different brushes using this palette can be a little inconvenient. A quicker method, which does not interrupt your work flow, is to right click your input device. This calls up an onscreen display of all brushes in the current category. When creativity is flowing, easier brush selection can make a huge difference in your work.
Grain in Painter
Here is a quick tip on Corel Painter. If you are trying to adjust the amount of paper grain that shows through in your brush stroke, adjust the “Grain” percentage in the brush toolbar.

A lower number creates more apparent grain. A higher number reduces the amount of grain. If you are like me, this seems to be a little backward, but Painter treats the higher number as deeper penetration in the paper.
Traditional Colors
One of the issues I have always had in digital painting, is choosing the right colors. Each type of traditional media has limitations based on the pigments available. Watercolors, for example, have a limited color range even when mixing various paints. Paint software, however, offers an unlimited number of colors, regardless of the medium you are trying to emulate. Using watercolor brushes, but unrealistic colors, will not create a traditional looking painting.
An interesting feature in Corel Painter exists in the color swatch dialog. It can really help you build an appropriate color palette. The first step is to open an image, a scan of an actual watercolor or oil painting for example, that contains the type of color palette you wish to use. Then select the triangle at the upper right of the color swatch dialog. A menu appears with several options available.

Select “New Color Set from Image”. Painter will sample and create a color set of the swatches available in the image. Providing you use an appropriate source, you should now have a proper color range that will allow you to create a more true to life traditional painting.


