Photoshop Circles
Some of you may know this one already, but I get this question from Photoshop users a lot: How do I draw a circle or arc? The answer is a little round about, but not difficult.
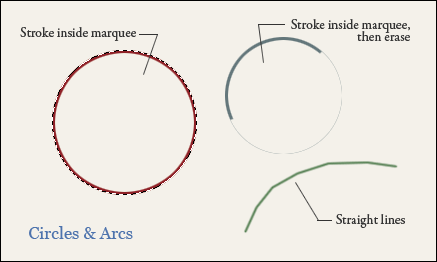
To begin with, create a new layer on which you want the circle. Then hold down the square marquee tool until the flyout appears, select the elliptical marquee tool. Click a point in your graphic to begin the selection marquee. While holding the shift key to constrain the marquee to a perfect circle, drag and then release to create the circle selection. You should now see the marching ants in a circle on your screen.
To create the circle, go to the edit menu and select the Stroke command. The dialog box will prompt you for line thickness, color, and so forth, when ready press “ok”. Your circle will appear in your graphic. For an arc, erase the portion of the circle you do not want.

Another way to create an arc is a little simpler, but less precise. When using the brush tool, click once as if to make a dot, and while holding the shift key, move to another location and press again as if to make another dot. You will then get a straight line between the two points. Shift and press again to get a continuation of the line. By moving around in an arc or circular pattern, you can create a faceted arc. Shorter, more precise segments will create a smoother arc. This method is crude, but very quick and controllable. I’m sure there are even more ways, there always are, but any of these three methods can get you started.


